Kubeflow Ep1: Introduction
Overview
![]()
Welcome to the Kubeflow series of Vu's blog. In this series, I am going to share with you guys all of my understanding and experience in development and operation using Kubeflow which I have obtained over a year working with such a brand-new game-changer DAG platform.
First of all, what is Kubeflow?
Kubeflow is a Machine Learning platform for Kubenetes which allows us to design, manage workflows. It is known as a high-level DAG platform that utilizes Argo as its foundation but with a Python interface SDK in place of traditional Kubenetes interface.
Why should we choose Kubeflow for our project over than the other tools?
Kubeflow can help us to reduce much effort which results in efficient concentration in the project.
By using Kubeflow, our codebase can be more shrinked than ever before.
It has friendly Python interface.
Like the name says it all, Kubeflow can be deployed anywhere which has already had Kubenetes installed.
It can leverage the power of Kubenetes.
Kubeflow is backed by Google.
Currently, Kubeflow is used by many big companies such as Spotify, GoJek, IBM to name a few.
Installation
Local
Fortunately, local installation is so straightforward thanks to the support of k3s or k3ai. The entire installation guide can be retrieved here
In this post, I would like to introduce to you guys how to locally install Kubeflow using k3s in which I have already had experience.
For more information about k3ai, please visit their site.
Linux
Run the following command to install k3s
1
curl -sfL https://get.k3s.io | sh -
Windows
- Enable WSL2
- Install Docker Desktop
- Open Docker Desktop -> Settings -> General -> Use the WSL2 based engine
- Download k3s binary here
- Copy the downloaded file to WSL2 home directory and execute permission to k3s binary
1
chmod +x k3s - Start k3s
1
sudo ./k3s server - In WSL2 session, copy
/etc/rancher/k3s/k3s.yamlto$HOME/.kube/config. - Edit the copied file by changing the server URL from https://localhost:6443 to the IP of the WSL instance, find it by typing
ip addr show dev eth0in the CMD.
For example, https://192.168.170.170:6443 where192.168.170.170is the ip of WSL2 instance.
Deploy Kubeflow
- Run the following commands
1
2
3
4
export PIPELINE_VERSION=1.7.0
sudo kubectl apply -k "github.com/kubeflow/pipelines/manifests/kustomize/cluster-scoped-resources?ref=$PIPELINE_VERSION"
sudo kubectl wait --for condition=established --timeout=60s crd/applications.app.k8s.io
sudo kubectl apply -k "github.com/kubeflow/pipelines/manifests/kustomize/env/platform-agnostic-pns?ref=$PIPELINE_VERSION" - Verify that Kubeflow Pipeline UI is accessible by port-forwardingFor Window user, run this command in cmd or powershell (no need to type
1
sudo kubectl port-forward -n kubeflow svc/ml-pipeline-ui 8080:80sudo) - Access http://localhost:8080
Uninstall
To uninstall Kubeflow, run this following command
1 | |
Cloud
You can follow the instruction here to find the right documentation for the cloud platform on which you are working.
Kubeflow Component
Pipeline
After successfully accessing to http://localhost:8080, you probably see this UI.
Kubeflow Pipeline UI helps you to manage pipelines and their version. It is supposed to be a version control tool but merely for pipeline and you are definitely able to commit a new pipeline, update its version, create run for the pipeline or even delete it. This Pipeline version control is easily interacted with the given above UI or the SDK. Now just attempt clicking at any pipeline, e.g. [Tutorial] DSL - Control structures
This pipeline page depicts the graph following the pipeline definition. Besides, there are some options like create run, upload version, create experiment and delete buttons that are respectively located on the right side of the page.
Pipeline ID could be retrieved in the Summary box or on the address bar. E.g: http://localhost:8080/#/pipelines/details/f52091e3-e428-43f7-8165-4fea81b93878 so the pipeline ID is f52091e3-e428-43f7-8165-4fea81b93878
Experiment
Experiment is a workspace for trying different configurations of a pipeline
You can use experiment to organize your runs into logical groups as well. It is also a space for containing scheduled runs configurations. Moreover, this Kubeflow Component permits you to compares runs directly in the page or by clicking Compare runs button, however, it requires the component has been set along with output metrics.
This is the experiment Default page.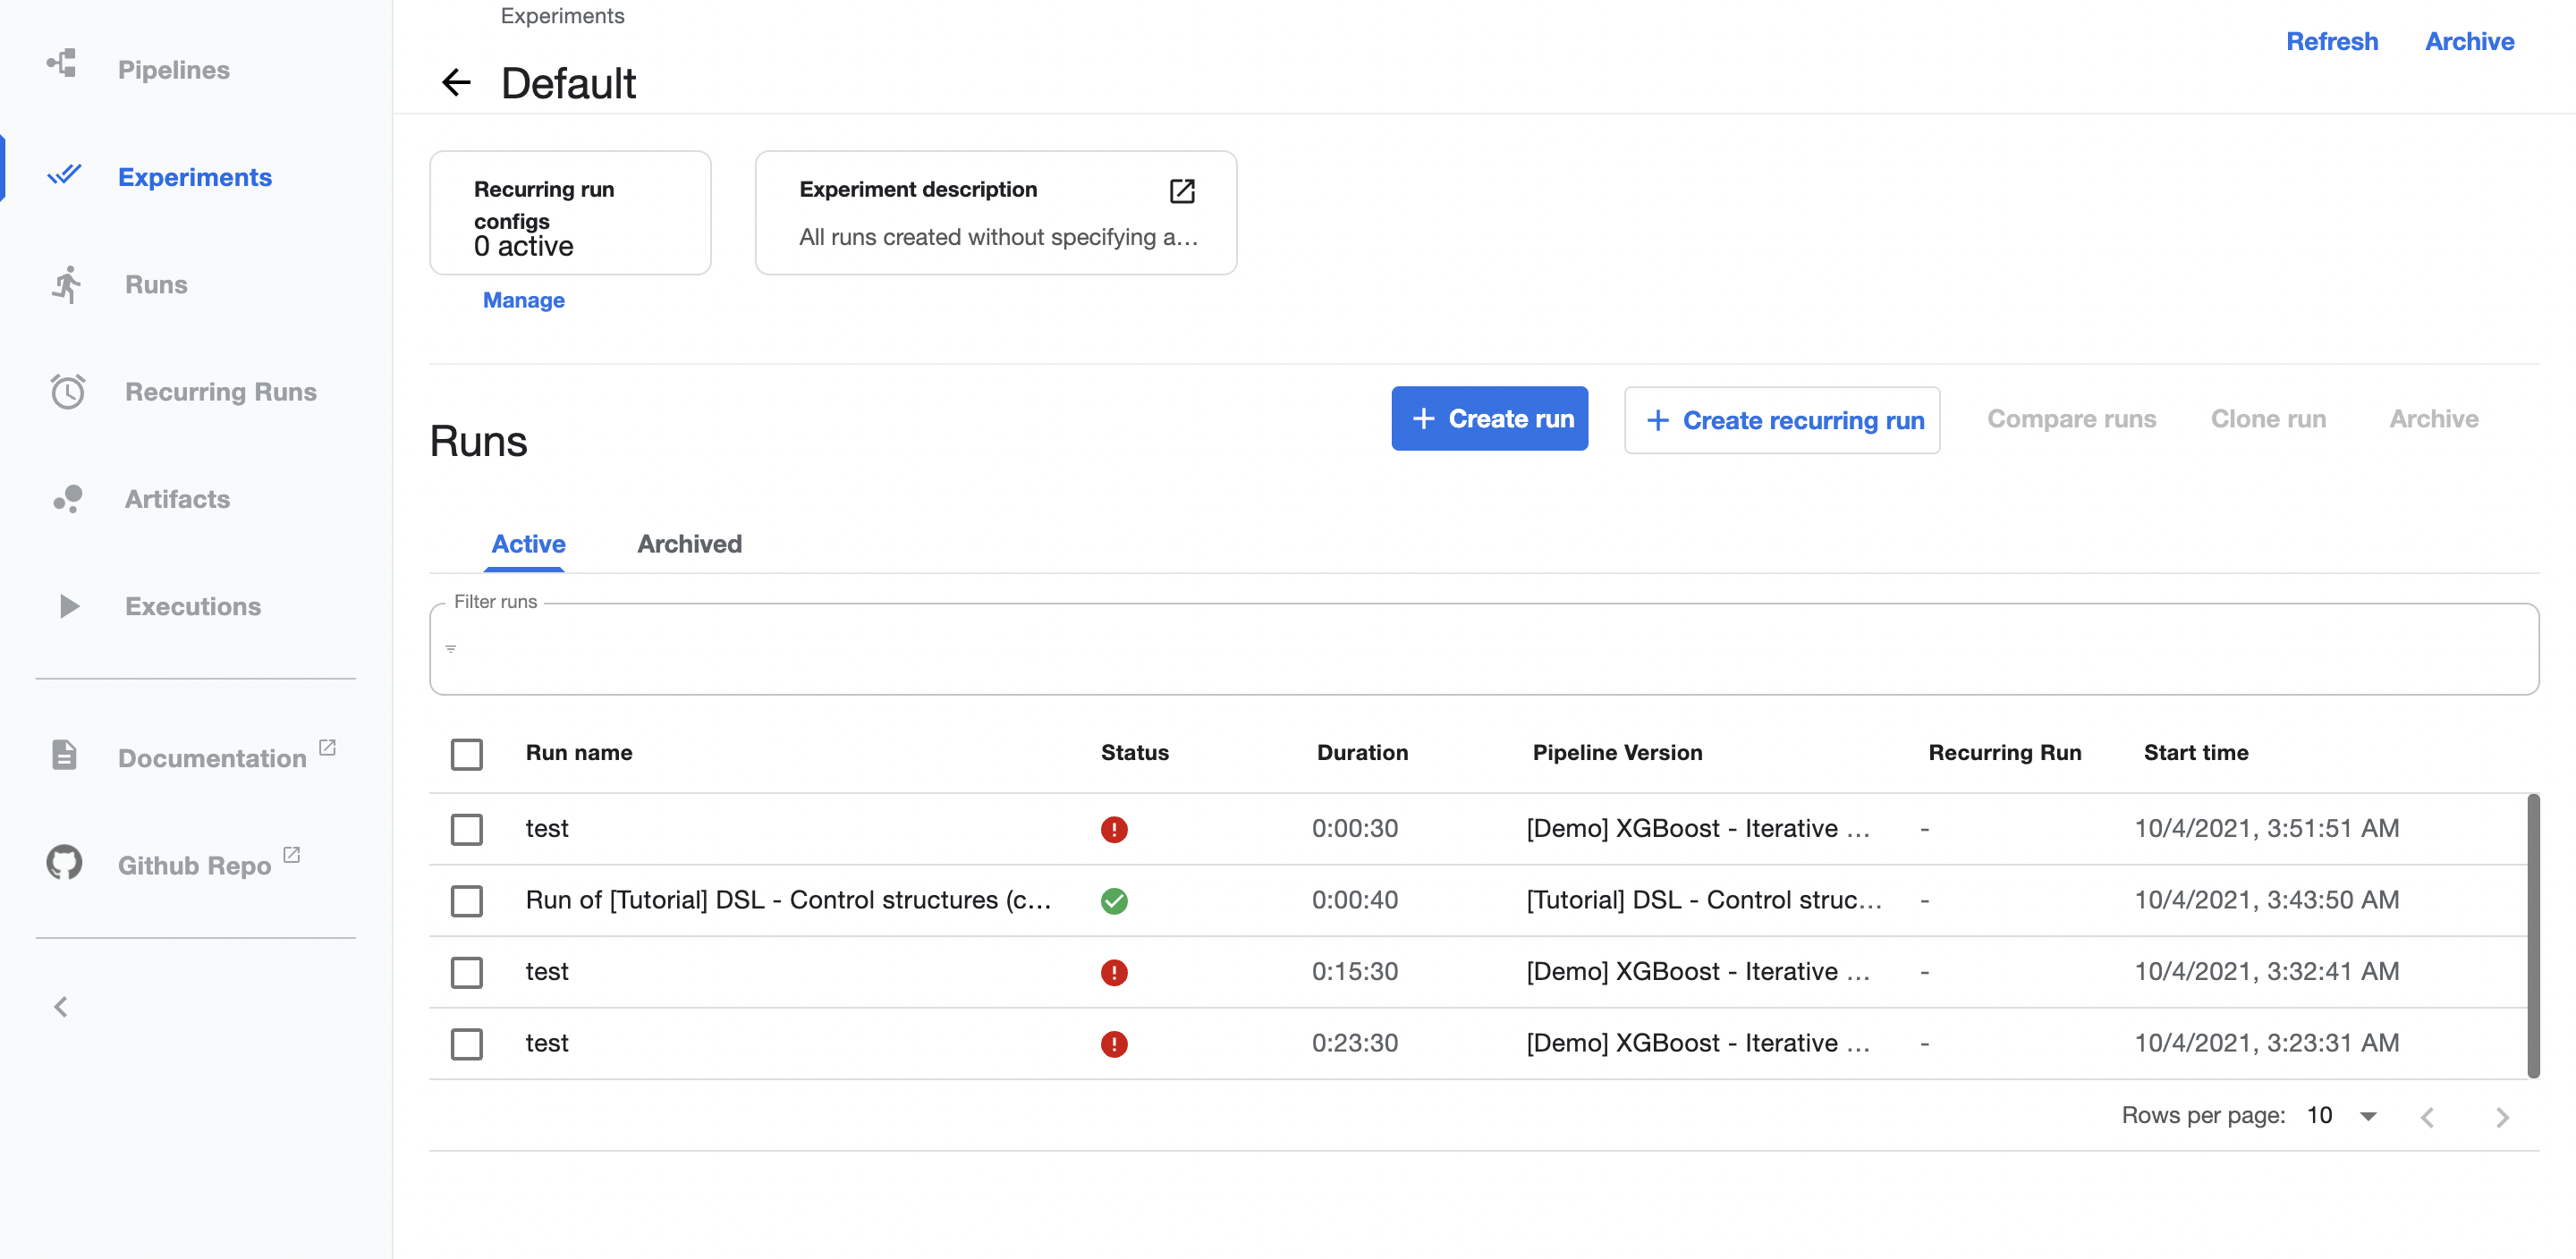
Experiment ID could be retrieved on the address bar. E.g: http://localhost:8080/#/experiments/details/f8e98b23-35d1-46bd-a7c2-95c5501334bf so the experiment ID is f8e98b23-35d1-46bd-a7c2-95c5501334bf
Run
This is normally an one-off execution which mean that it will run only once.
You can retrieve runs in a specific experiment or open Runs page to get the list of all existing runs.
Job
An other name of Job is Recurring Runs which refers to scheduled runs.
Example
Run a basic example using UI.
- Access to http://localhost:8080/
- Go to Experiments
- Click at Create experiment to create new experiment

- Go to Pipelines ->
[Tutorial] DSL - Control structures-> Create run

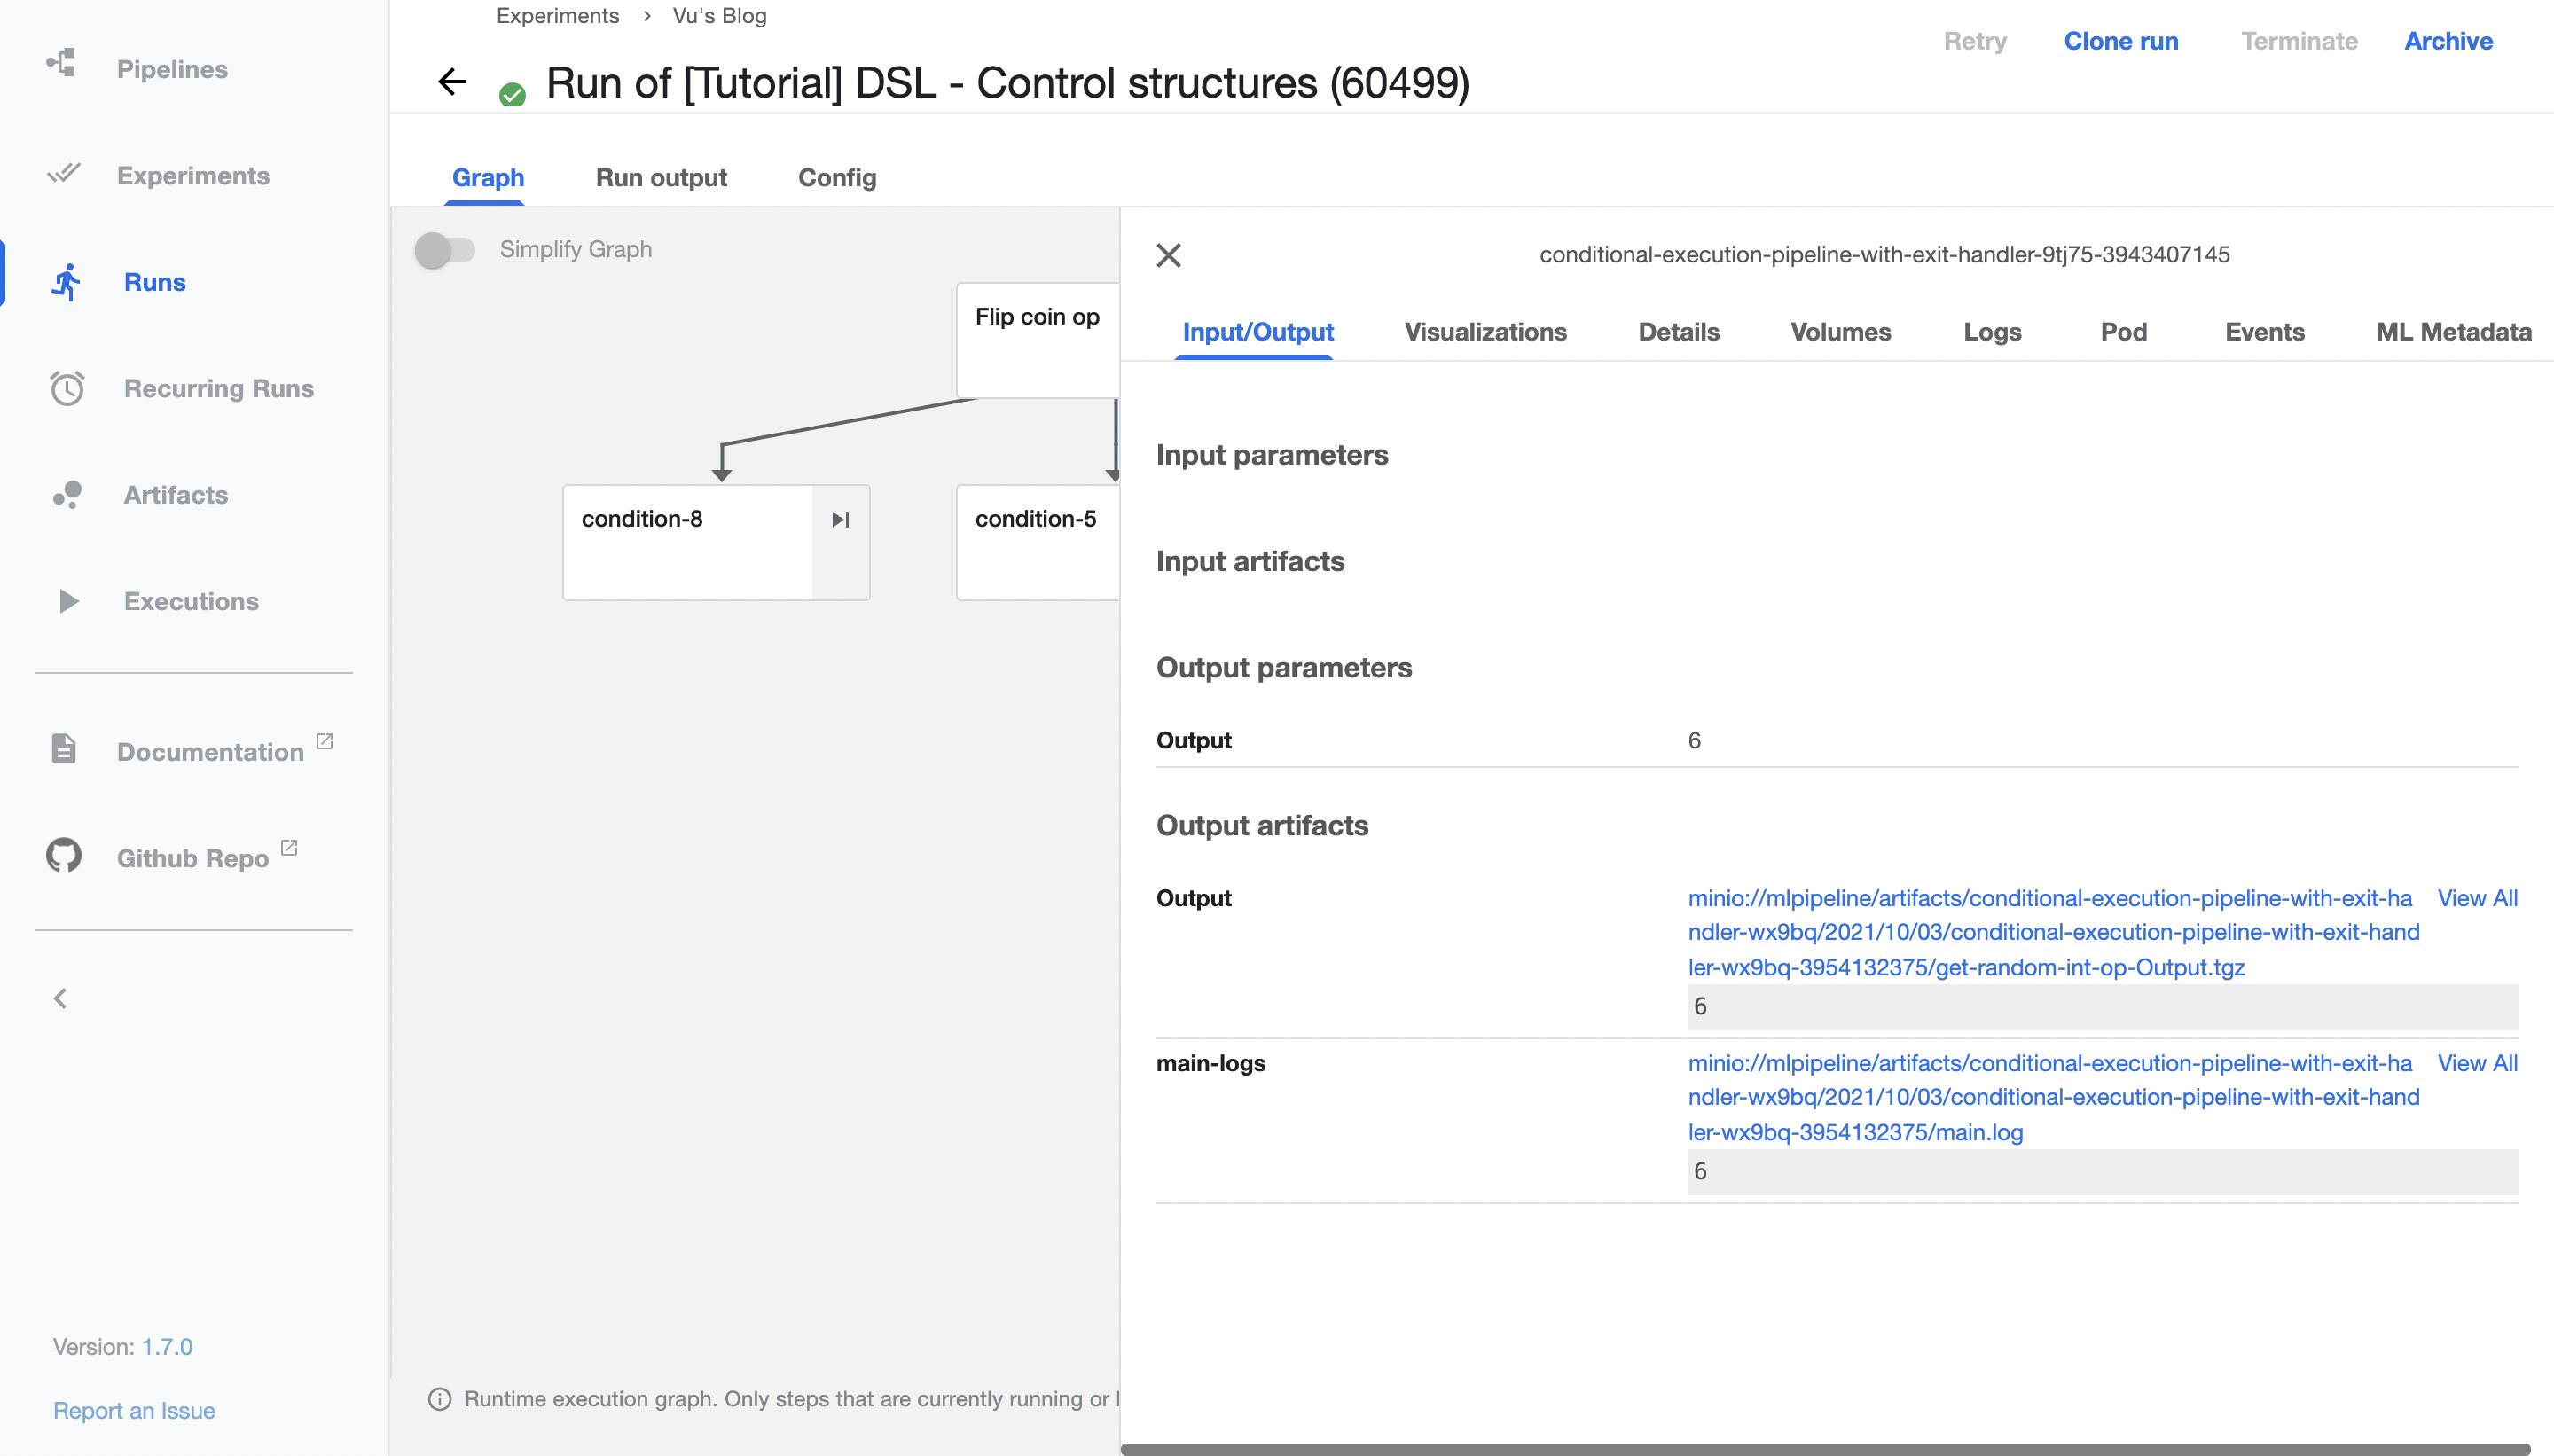
- Go to experiments Vu's Blog or access to Runs to see run details

- Try clicking any component to explore more details of the task.
Kubeflow Pipelines SDK
Kubeflow SDK provides a Python library that allows you to interact with Pipelines, Components, and provides a set of API to communicate with Kubeflow backend.
In this blog, I highly recommend you to use my example code snippets to have a better understanding of the SDK instead of reading the whole documentation here which is definitely difficult for beginner.
Installation
To install Kubeflow SDK, run this following command
1 | |
Example
- Open your local notebook
- Go to Kubeflow component Pipeline, choose an abitrary example pipeline then copy the pipeline ID in the Summary box or on the address bar. For instance:
http://localhost:8080/#/pipelines/details/<pipeline_id> - Go to Experiments, create an experiment and copy its
IDon the address bar. For instance:http://localhost:8080/#/experiments/details/<experiment_id> - Snippet
- Create a client instance
1
2import kfp
client = kfp.Client("http://localhost:8080/pipeline") - Run a pipeline
1
2
3
4
5run_result = client.run_pipeline(
pipeline_id="<pipeline_id>",
experiment_id="<experiment_id>",
job_name="Example pipeline"
) - Click on Run details that will lead you to the Run UI of the pipeline.
Packages
kfp.compiler: Compile Python pipeline function intoYAMLfile which can be read by the backend.kfp.components: includes all the method of transforming, loading kfp components.kfp.dsl: contains domain-specific language(DSL) that is used to interact with pipelines and components. Keep in mind that the SDK has its own way to define components and operators to compile pipelines and components intoYAMLfile. In my opinion, it is quite similar to Tensorflow v1 especially in terms of graph definition.kfp.Clientcontains Python client libraries for the API.
Summary
In this post, we have known:
- what Kubeflow is
- why we should use Kubeflow
- how to install
- what Kubeflow SDK is
In the upcoming posts, I would like to share to you folks the way of using kfp for your projects includes:
- Pipeline
- Component
- Operator
- Artifact
Thank you for your reading! Stay tuned for upcoming posts!
Please feel free to leave a comment if you have any concerns.
Peace ❤️❤️❤️